Next.js project starter for large projects
December 22, 2022
Introduction
Modern web front-end development has become complex and cumbersome. The days of simply including jQuery in a script tag are long gone.
These days, a front-end app has to handle Server Side Rendering (SSR) and Client Side Rendering (CSR), data hydration, caching, HTTP request management, and more.
But that's not all. Components have to be well-documented, logically named, and structured in a way that's easy to navigate.
And on top of that, styling has to be easily extendable, performant, and maintainable.
In this article, I'll attempt to share the tools and practices that I've come to value while working on front-end projects. We'll be going through a Next.js project starter that features a simple CRUD (Create, Read, Update, Delete) application.
Although I've provided React.js-based examples, I believe that you can use the underlying principles in other major JavaScript frameworks like Angular, Vue, or Svelte.
Prerequisites
Before we get started, it's important to note that you'll probably need some web development knowledge to follow along.
You can visit the GitHub repository here: next-js-project-starter-for-large-projects
If you're interested in learning more, I've included a Further Reading section at the end of the article.
Result
By the end of the article, you'll have learned how to structure a Next.js project by analyzing a simple CRUD application that features a list of items that can be created, read, updated, and deleted.
1: Connecting our front-end app to a back-end REST API
1.1 SSR and CSR + data hydration
SSR stands for server-side rendering. It's a technique that allows you to render your app on the server and send the generated HTML to the client (browser).
It's a must-have feature if you're building an app with dynamic content that needs to be indexed by search engines. It also improves the initial load time of your app.
For smaller projects like blogs, you could get away with SSG (Static Site Generation), which generates the HTML at build time. However, for larger projects, SSR is the way to go.
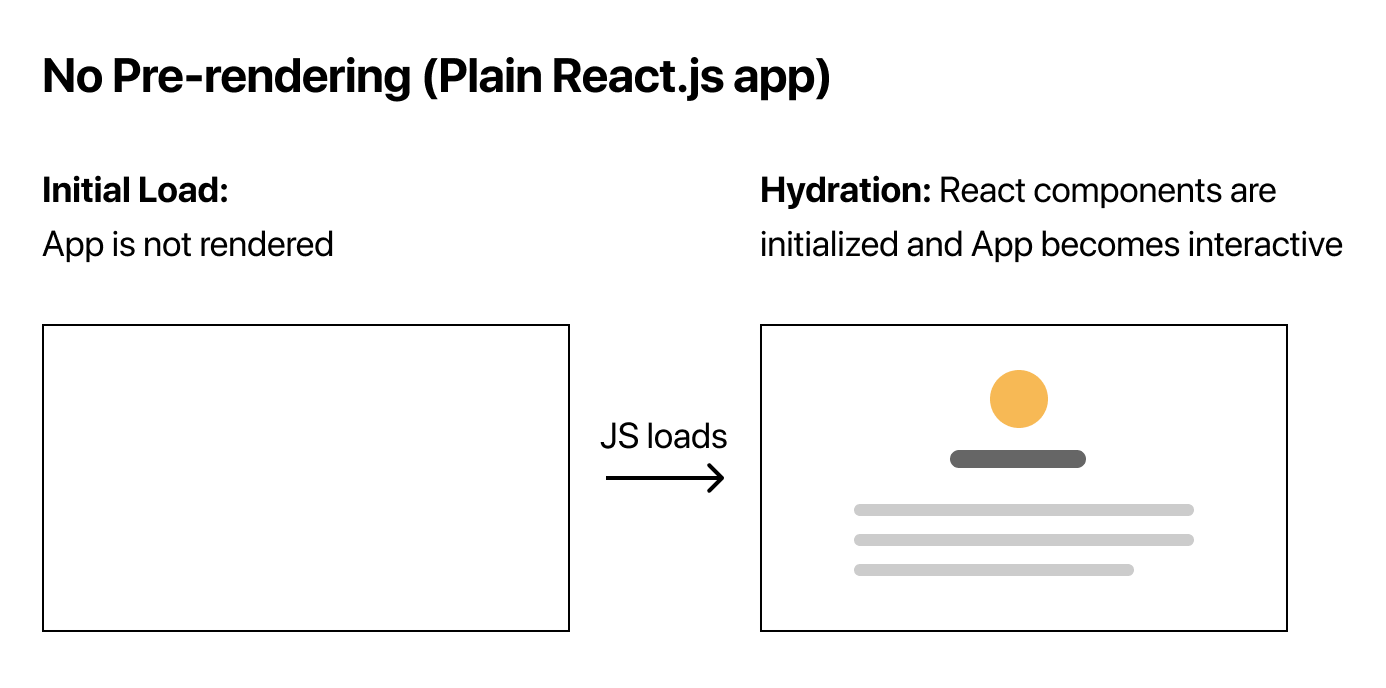
CSR stands for client-side rendering. It's the default rendering strategy for React.js apps. The browser downloads the JavaScript bundle and renders the app on the client side.
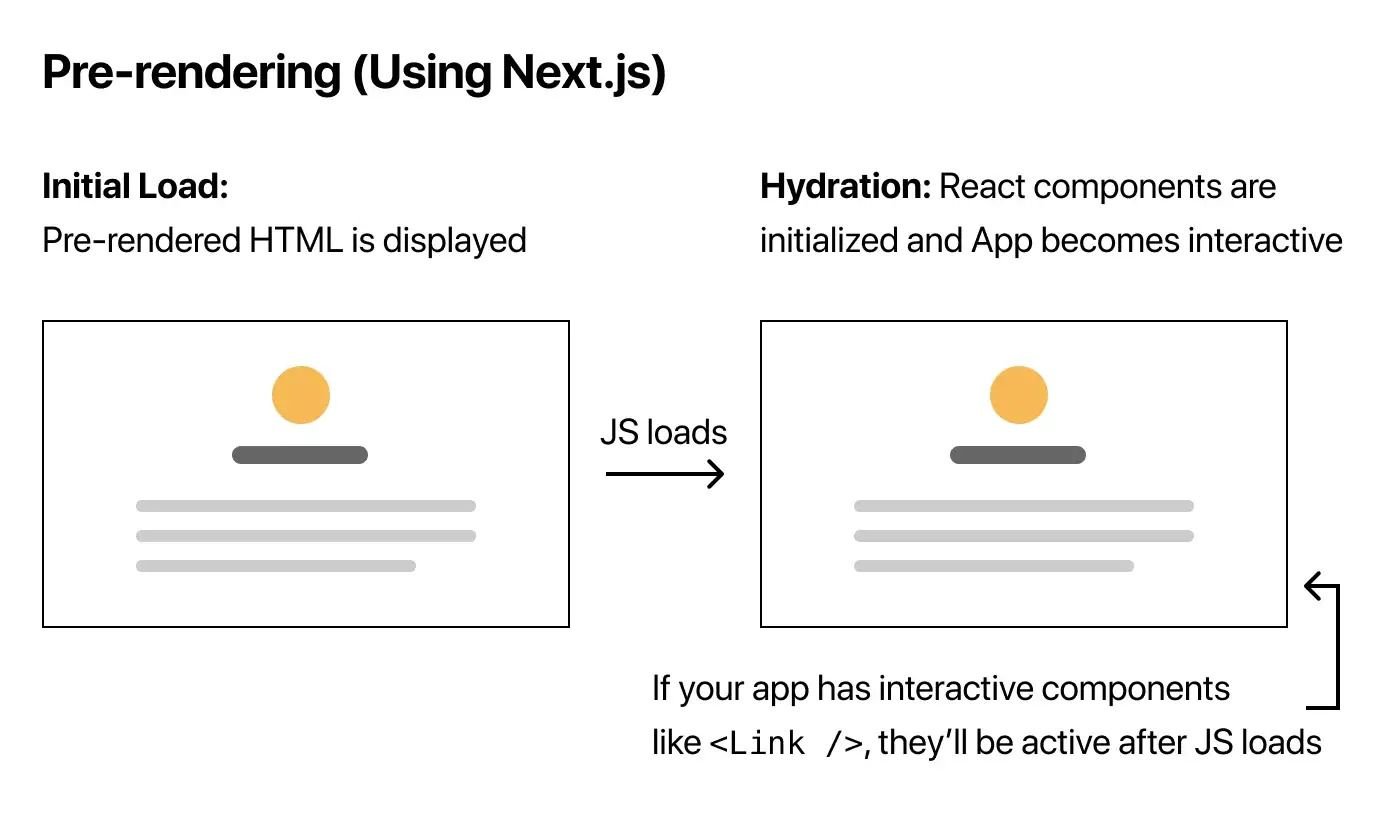
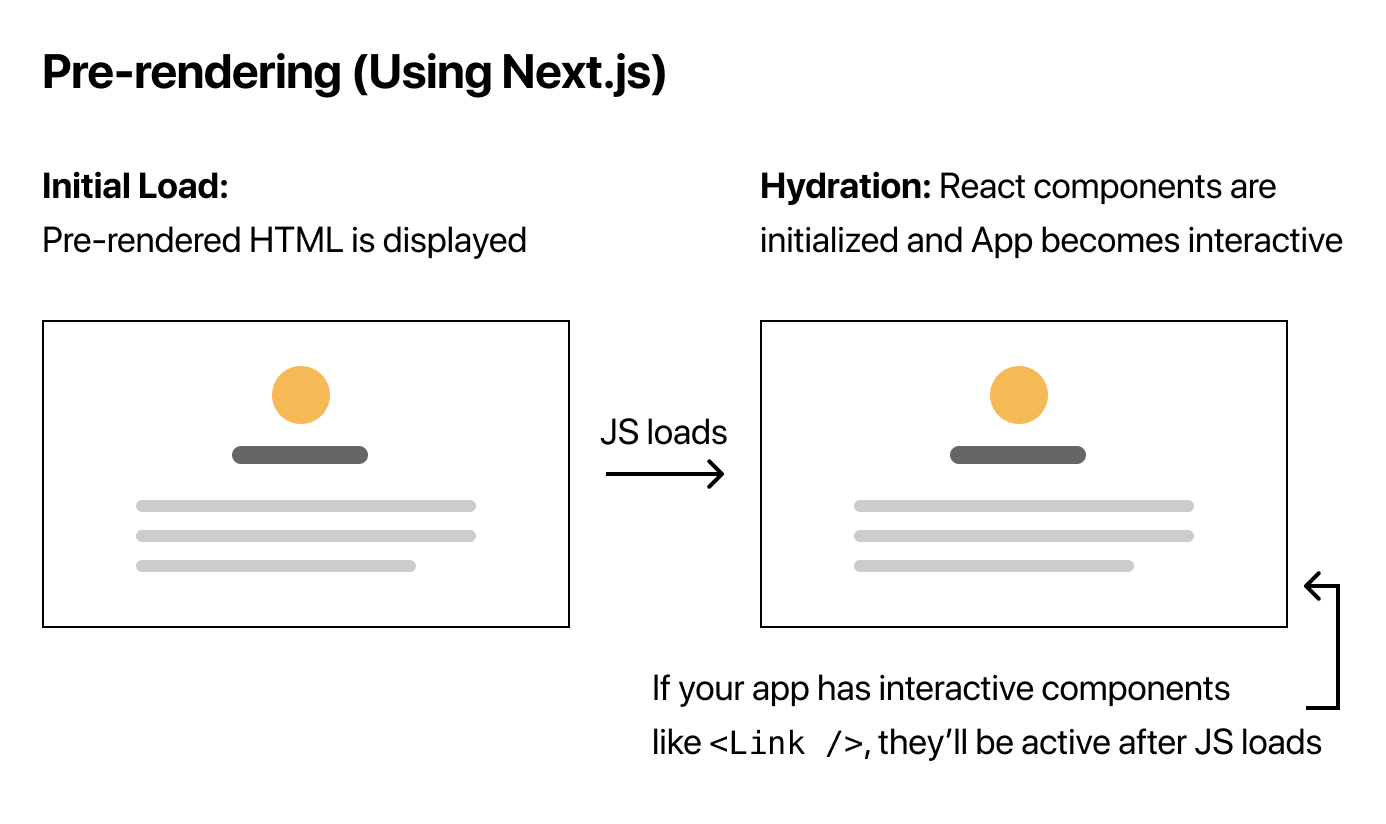
I've attached some graphs from the official Next.js documentation that illustrate the difference between SSR and CSR.
The picture above shows an app designed to paint page content using JavaScript after the initial HTML has been loaded.
The picture above shows an app that will generate HTML on the SSR side and send a fully rendered page to the client.
The tricky part about using SSR is that the data fetched on the server will remain there unless we somehow pass it to the client (browser). This process is called hydration. You can implement it using many different tools, but my favourite is React Query.
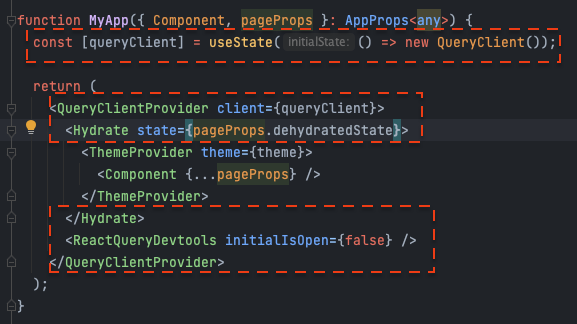
You can find this code in the repository at _app.tsx
In the screenshot above, the hydration setup is marked out in red.
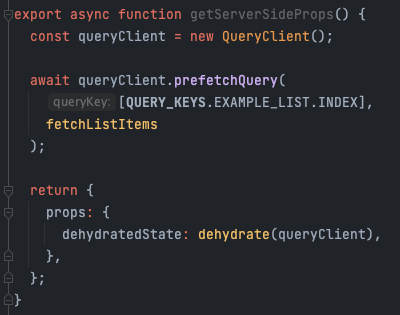
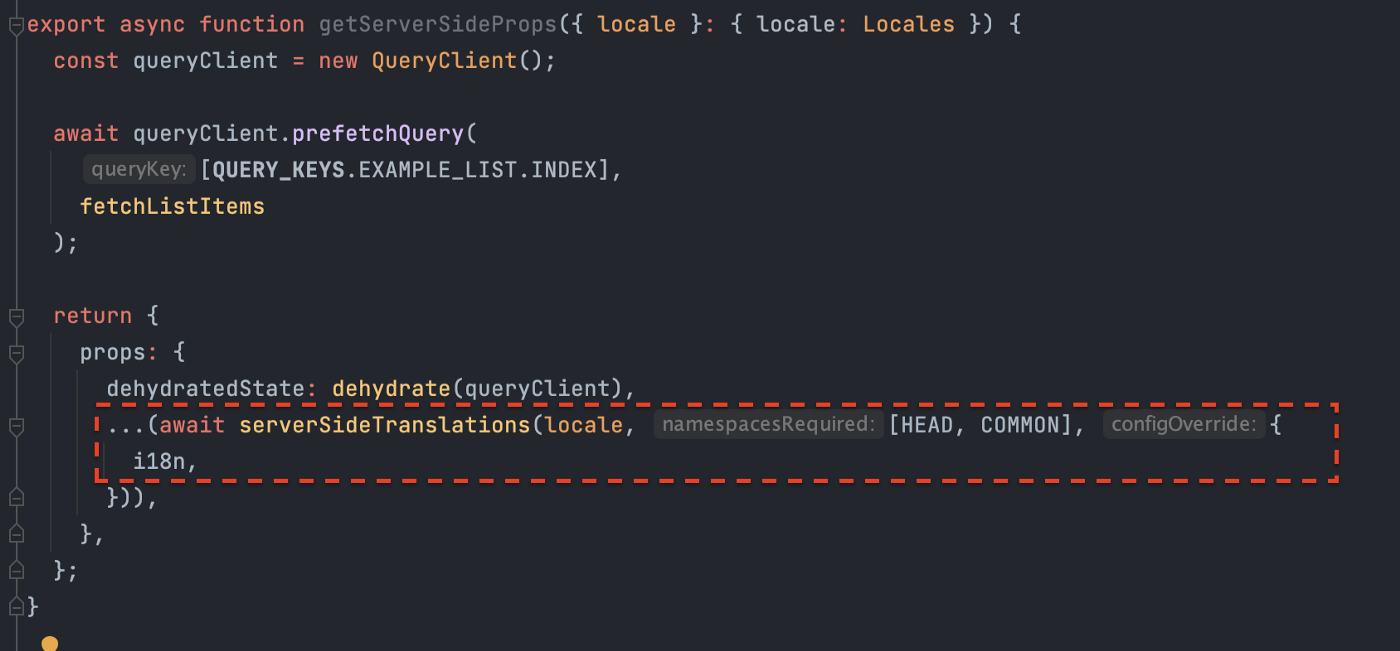
You can find this code in the repository at examples/index.tsx
The screenshot above shows a getServerSideProps function that fetches data on the server and passes it to the page component via the dehydratedState prop.
1.2 FE caching using Queries
"There are only two hard things in Computer Science: cache invalidation and naming things." — Phil Karlton
Luckily for us, React Query does all the hard lifting when it comes to caching. It provides a simple API that allows you to fetch data and cache it automatically.
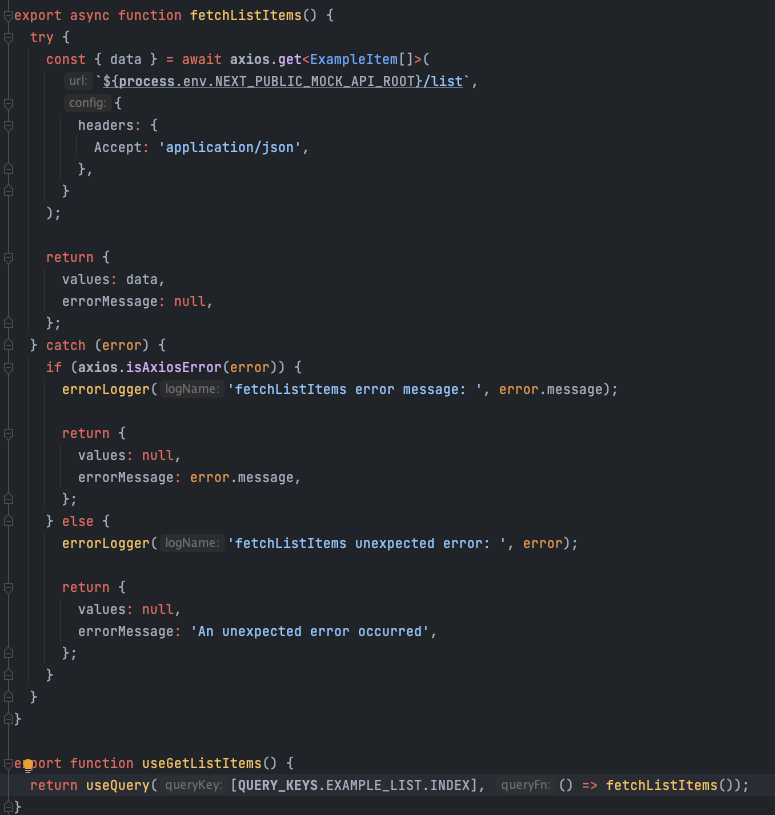
You can find this code in the repository at api/queries/example-list.ts
The screenshot above shows two functions. The first function is a fetcher that makes an HTTP GET request to the API. The second function is a custom hook that uses React Query's useQuery hook to fetch and cache the data.
You can find this code in the repository at components/containers/examples/List/List.tsx
The screenshot above shows how easy it is to consume data from React Query. The useExampleList hook returns the data, loading state, and error state.
Another thing that's handy about React Query is that it deduplicates requests. If you have multiple components that use the same query, React Query will only make one request.
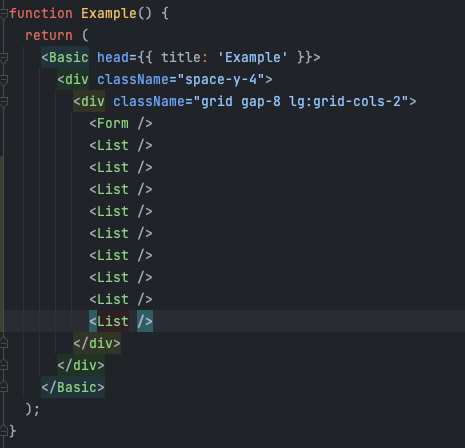
You can find this code in the repository at pages/examples/index.tsx
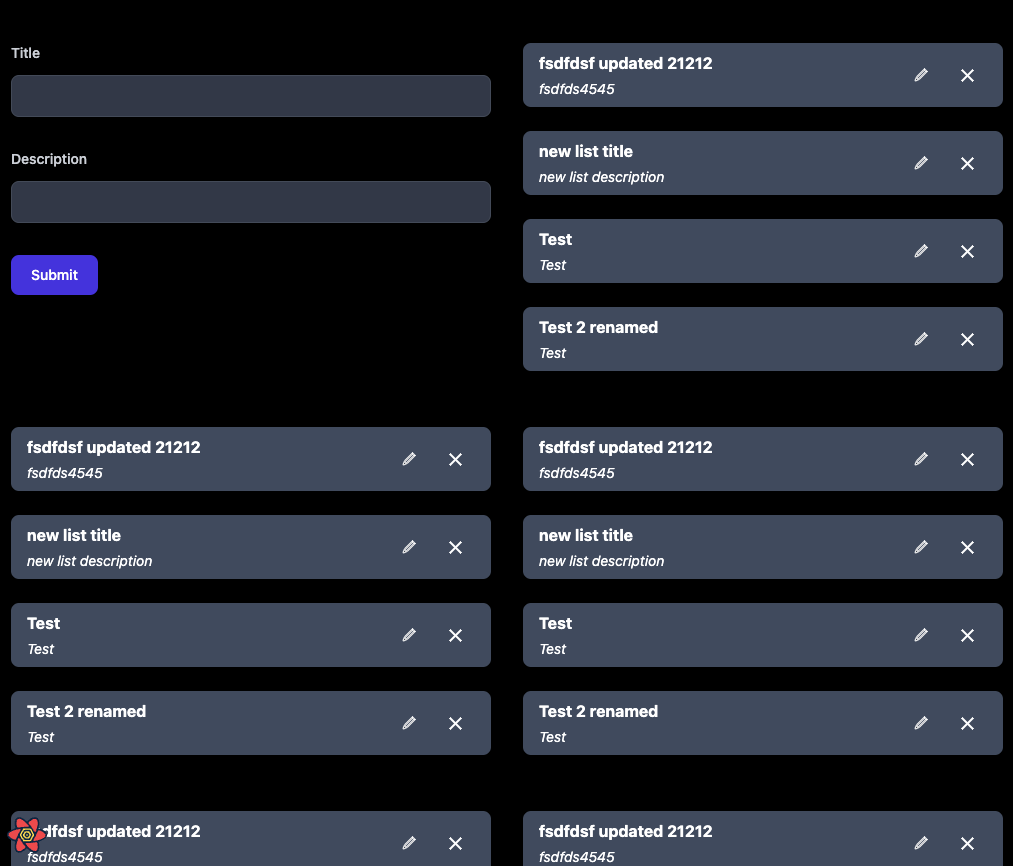
The screenshot above shows the same List component included ten times on the page. You might expect ten separate HTTP requests, but that's not what happens.
Ow, it looks messy!
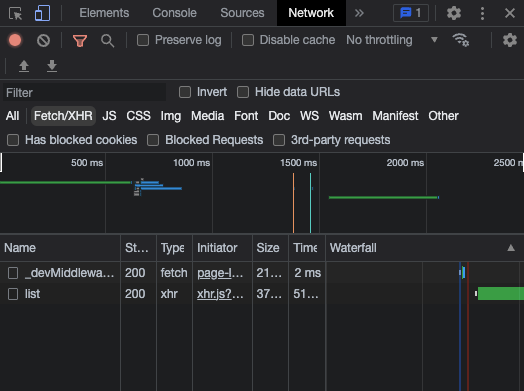
In the screenshot above, the UI looks cluttered with ten lists on the page. However, the exciting part is that if you look at the Network tab in the browser's developer tools, there's only one request made to the API.
Wow, look at this clean, shiny single list HTTP request!
This type of caching is super helpful when you have multiple components that need the same data. It reduces the number of requests made to the API and improves the performance of your app.
1.4 Data mutations
We've previously talked about Queries, which handle our app's HTTP GET requests. Now let's talk about handling the rest of our app's HTTP POST, PATCH, PUT and DELETE requests.
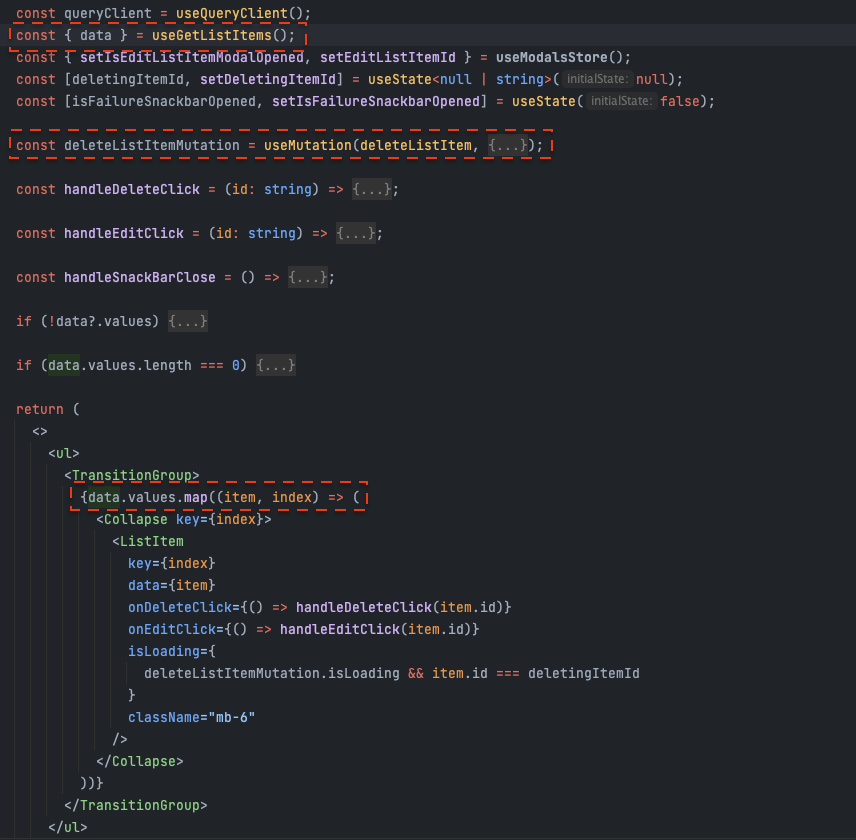
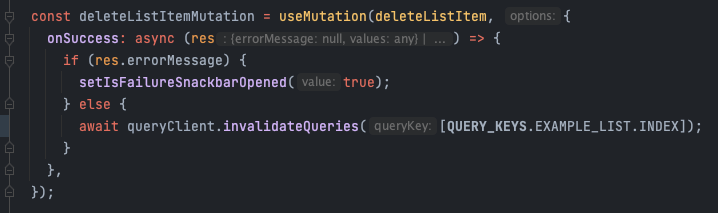
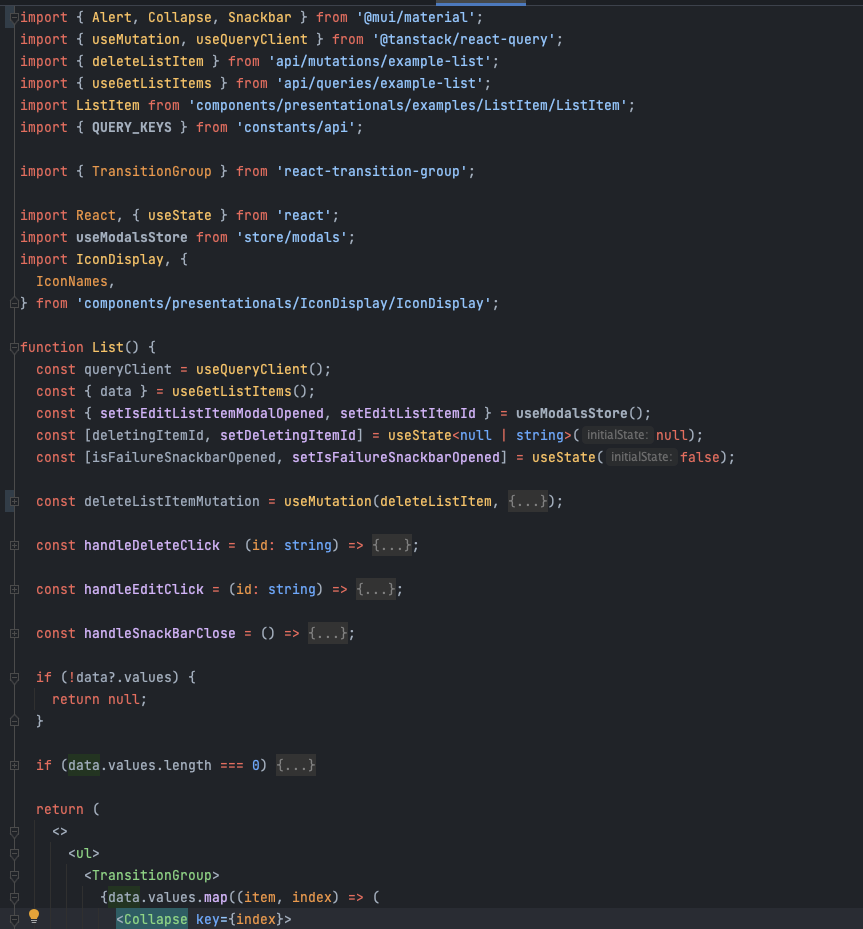
You can find this code in the repository at components/containers/examples/List/List.tsx
In the screenshot above, you can see an example of a delete list item mutation. When the delete button is clicked, the mutation is triggered, and upon success, the query cache is invalidated, causing the list to refetch.
What's interesting is that using the MUI library and React Query makes it easy to animate the loading state of the delete action. The user gets immediate visual feedback while the request is being processed.
1.5 Handling loading state
From a user experience point of view, the best loading state for an app is not having any loading state at all.
If your infrastructure allows it, and you can use SSR to fetch data before the page is rendered, the user will see the content immediately without any loading indicators.
For actions the user performs afterthe page is loaded, such as opening a modal or submitting a form, you'll need to handle loading states on the client side.
In the GIF above, you can see that while an individual list item is being loaded, a skeleton loader is displayed. This gives the user a sense of progress and prevents layout shifts.
Notice that after I click to open the same modal for the second time, our cache returns the data instantly, so the skeleton loader is not shown again. This is the power of React Query's caching.
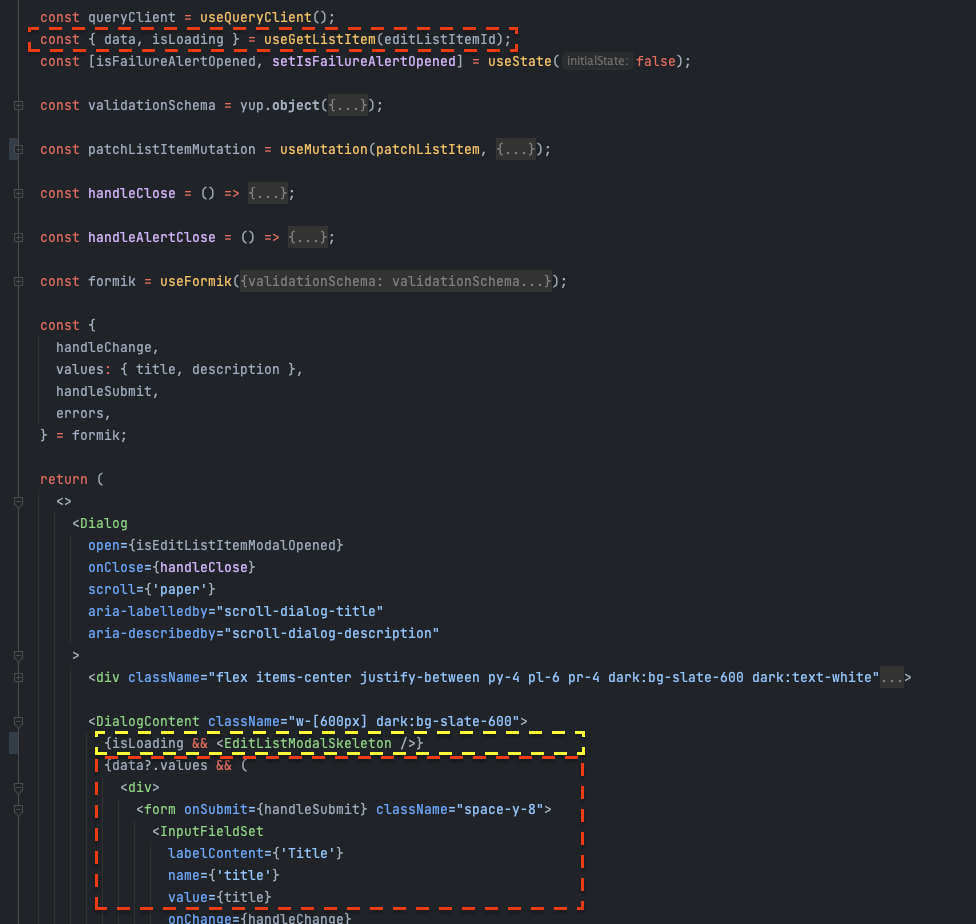
You can find this code at components/containers/modals/examples/EditListItemModal/EditListItemModal.tsx
1.3 Mock API
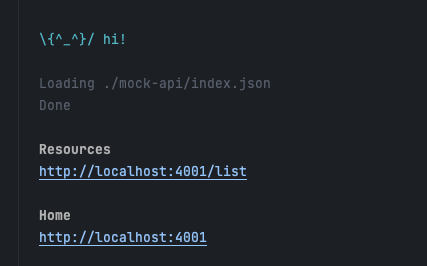
In the project starter, you can also find a mock JSON API that simulates a back-end REST API. This is useful for developing the front-end without having to set up a real back-end.
Mock JSON server
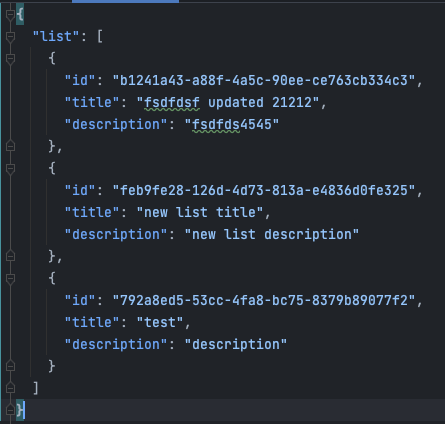
Mock JSON database
2: Writing UI Components
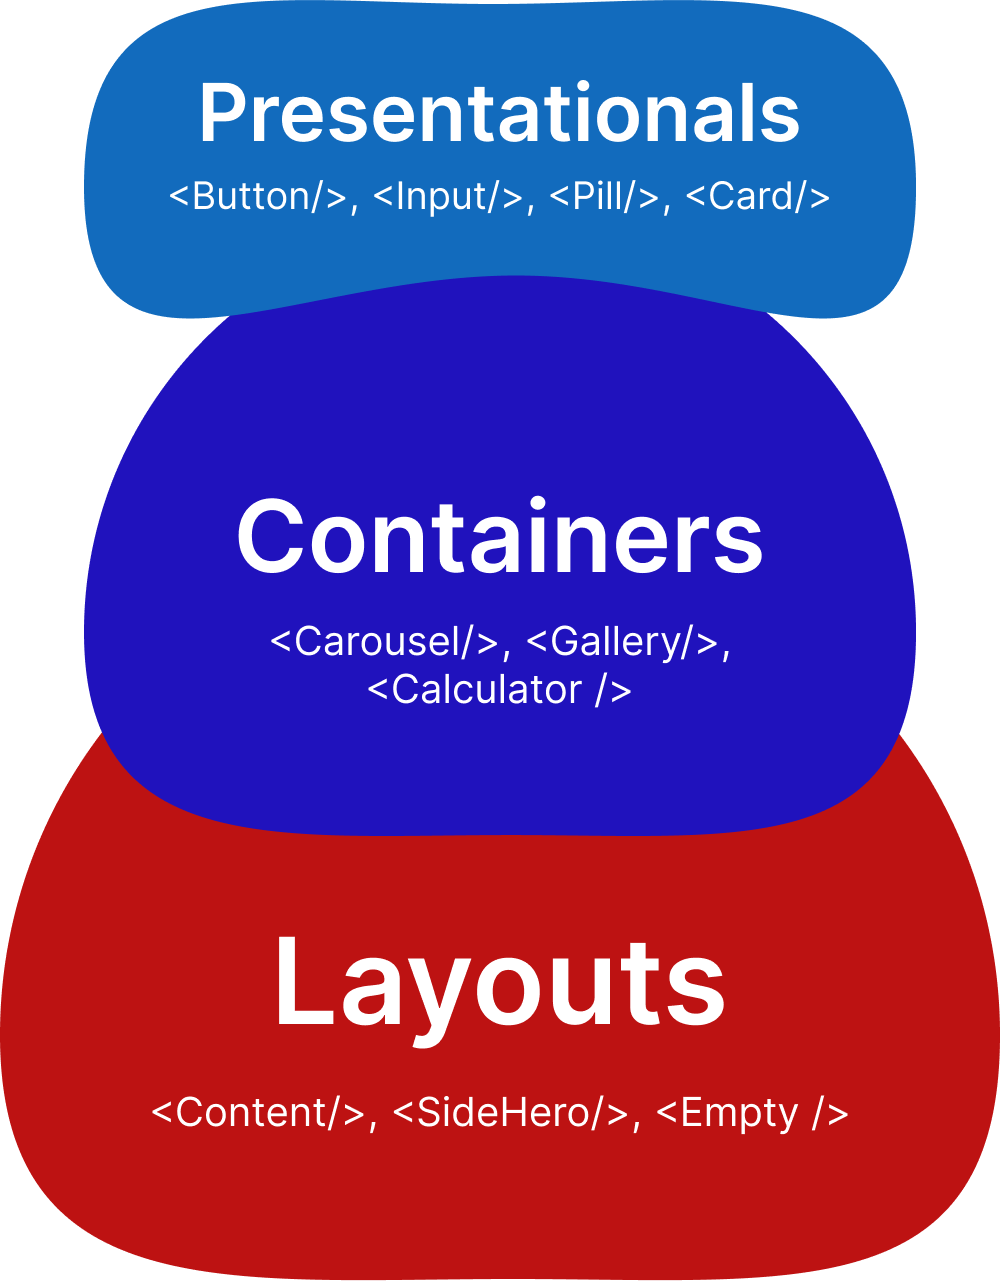
2.1 Component naming structure: layouts, containers and presentationals
There're many different ways to name and structure components. However, I've found that splitting them into three categories works well for larger projects.
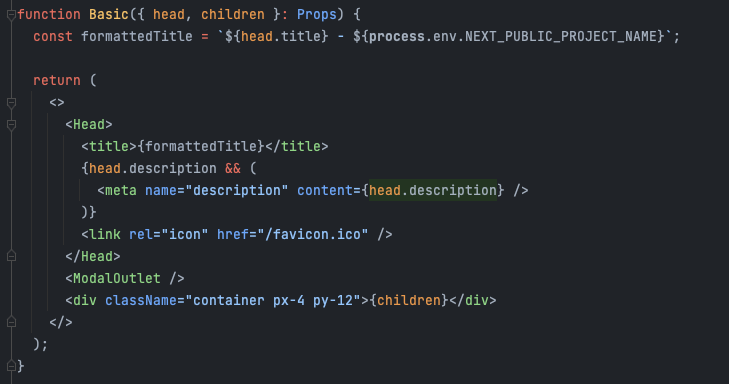
Layouts:Layout components are responsible for the layout of your page. They define the overall structure, such as the header, footer, sidebar, and main content area. Layout components typically don't contain any business logic.
You can find this code at components/layouts/Basic.tsx
Containers: Out of all components, container components contain the most component-level UI logic. They are responsible for fetching data, handling user interactions, and passing data down to presentational components.
You can find this code at components/containers/examples/List/List.tsx
Side note: I find it helpful to abstract larger code blocks into custom hooks. This keeps the component file clean and focused on rendering.
Presentationals: Presentational components are the smallest building blocks of your UI. They are responsible for rendering the UI based on the props they receive. Examples include Buttons, Inputs, Cards, Images, etc. They should not contain any business logic or data fetching.
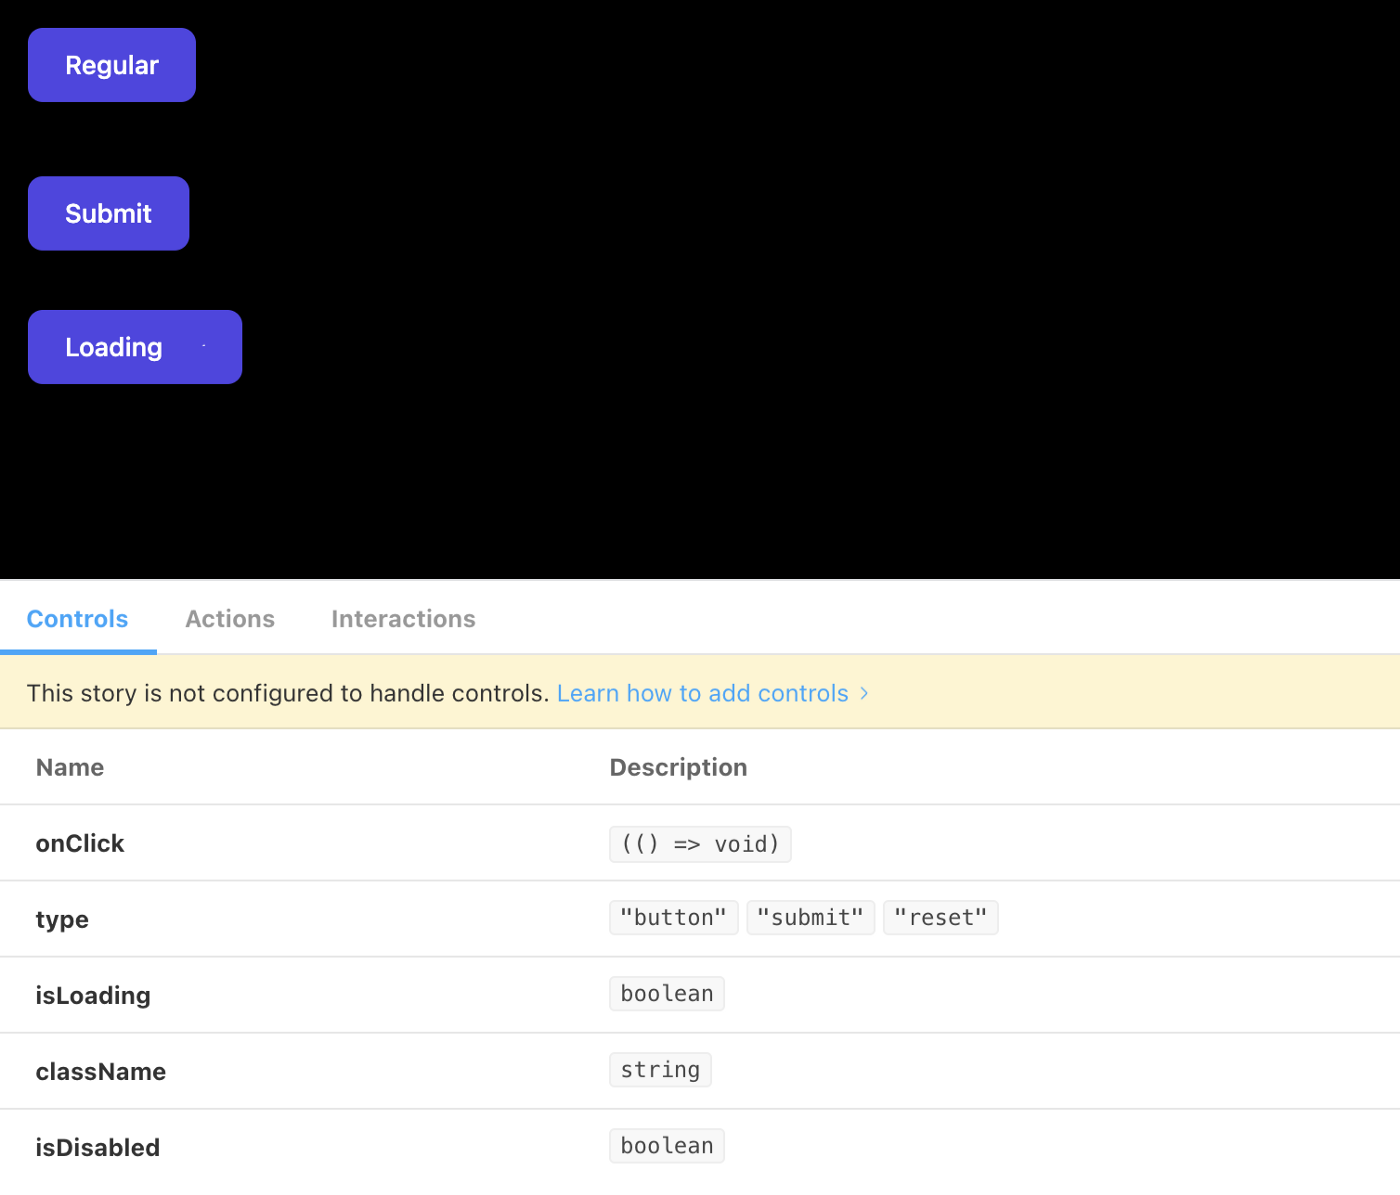
2.2 Storybook documentation
Although for smaller projects, you can get away with a simple kitchen sink page for documenting your components, larger projects benefit from a more structured approach. Storybook is a great tool for documenting your UI components in isolation.
2.3 Using folder names based on a business case to structure components
As your project grows, you'll find that a flat component structure becomes hard to navigate. Folder naming should be synced with your API documentation and the business domain.
For example, a structure that's hard to scale:
- components/UserCard
- components/UserList
- components/UserModal
- components/ProductCard
- components/ProductList
- components/ProductModal
A structure that's easier to scale:
- components/containers/users/UserCard
- components/containers/users/UserList
- components/containers/users/UserModal
- components/containers/products/ProductCard
- components/containers/products/ProductList
- components/containers/products/ProductModal
Structuring component folders this way gives us several advantages: shorter component names, easier navigation in large codebases, and a clear mapping between the front-end and the API.
3: CSS Styling
There are probably more ways to style your app than fish in the ocean. Here are the criteria I use when evaluating a CSS approach:
- Scalability - How well does the approach scale as the project grows? Will the CSS bundle size grow linearly or will it plateau?
- Performance - Does the approach add runtime overhead? Is it optimized for production?
- Maintainability - How easy is it to maintain and update the styles? Can you make changes without unintended side effects?
- Readability - How easy is it to read and understand the styles? Can a new developer onboard quickly?
3.1 Using Tailwind for Scalability and maintainability
The graph above illustrates the difference between isolation-based CSS (like CSS Modules or Styled Components) and utility-based CSS (like Tailwind). The red line represents isolation-based CSS, where the bundle size grows linearly as you add more components. The blue line represents utility-based CSS, where the bundle size plateaus because utility classes are reused across components.
The only real downside with Tailwind is code readability. Class names can get long and hard to parse. Here are some pointers for keeping your Tailwind code clean:
- Use component abstractions to encapsulate complex class combinations
- Use the
classnameslibrary to conditionally apply classes - Use Tailwind's IDE plugins for auto-sorting and formatting class names
- Break long class strings across multiple lines
3.2 Accessibility and dark/light mode
Accessibility: I prefer widely used frameworks like Material Design for React (MUI) for complex interactive components like modals, dropdowns, and date pickers. These frameworks have been battle-tested for accessibility and provide proper ARIA attributes out of the box.
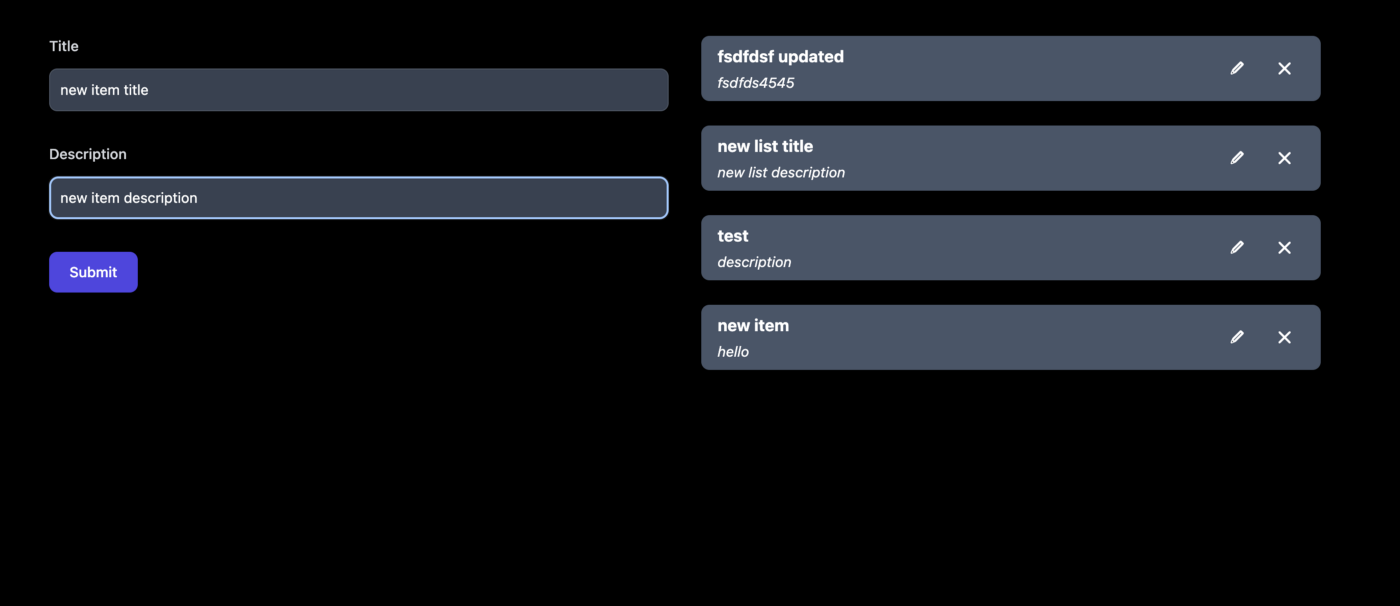
Dark mode:Tailwind makes it really easy to implement dark mode using the 'dark:' directive. You can prefix any utility class with 'dark:' to apply it when the user's system or app preference is set to dark mode.
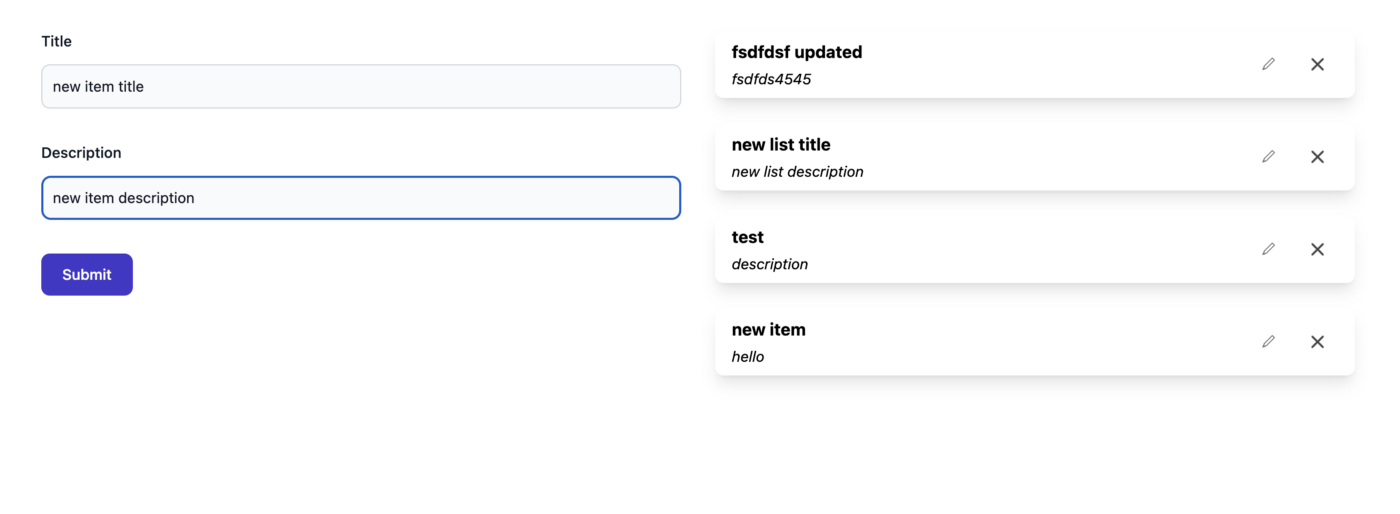
Dark UI example in the browser
Usage of Tailwind's dark: directive
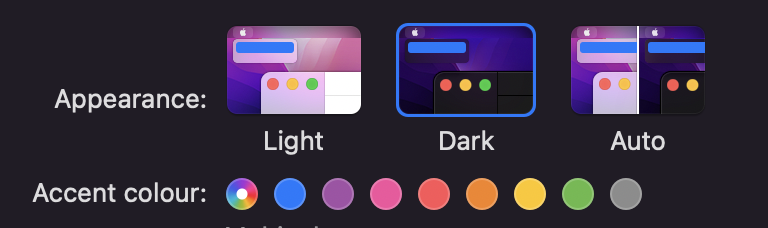
Dark system preference
4: Testing our App
Automated testing is an essential process for any serious software project. It helps catch bugs early, provides documentation for how the code should behave, and gives you confidence when refactoring.
In a front-end codebase, testing is beneficial only in very specific places. Overtesting can lead to:
- a) Unreliable tests - Tests that break frequently due to UI changes, even though the underlying logic is correct.
- b) Redundant tests - Tests that duplicate what the type system or linter already catches.
4.1 Unit testing
Example of a unit test using Jest & TypeScript
4.2 E2E testing
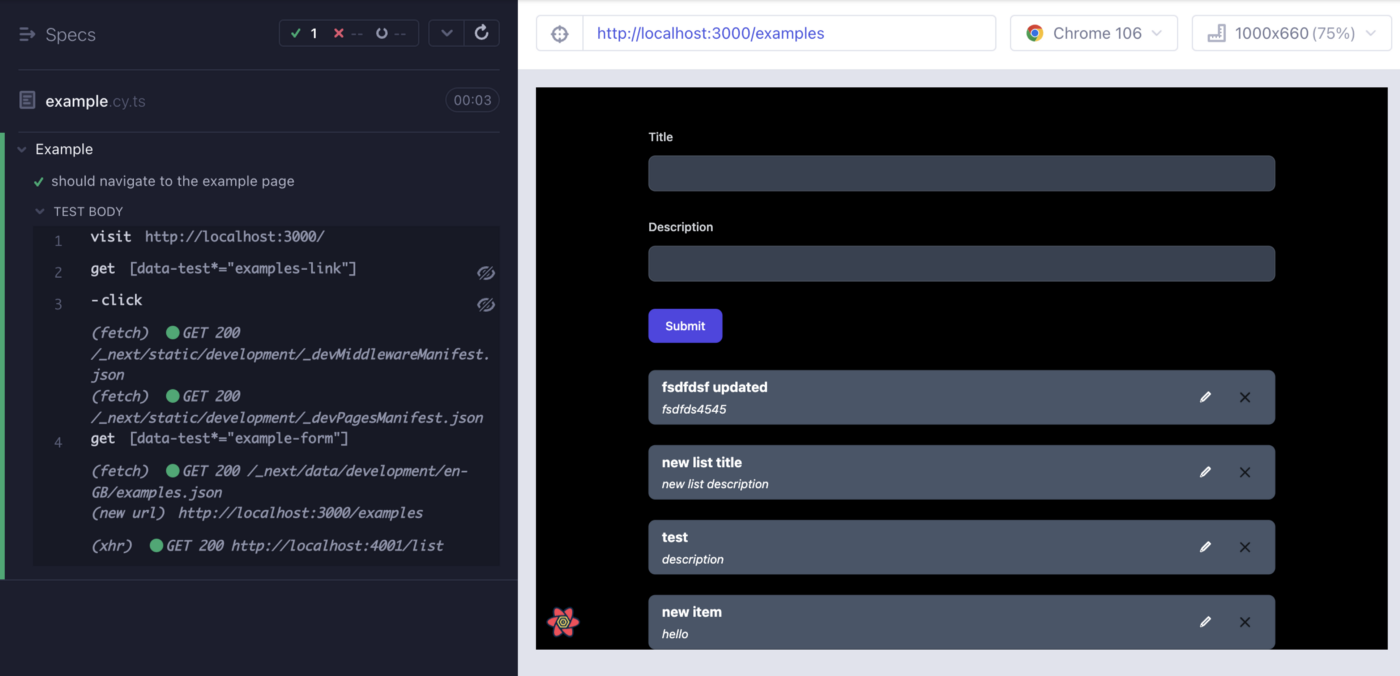
You can find this code at: cypress/e2e/example.cy.ts
5: Making our App multi-language
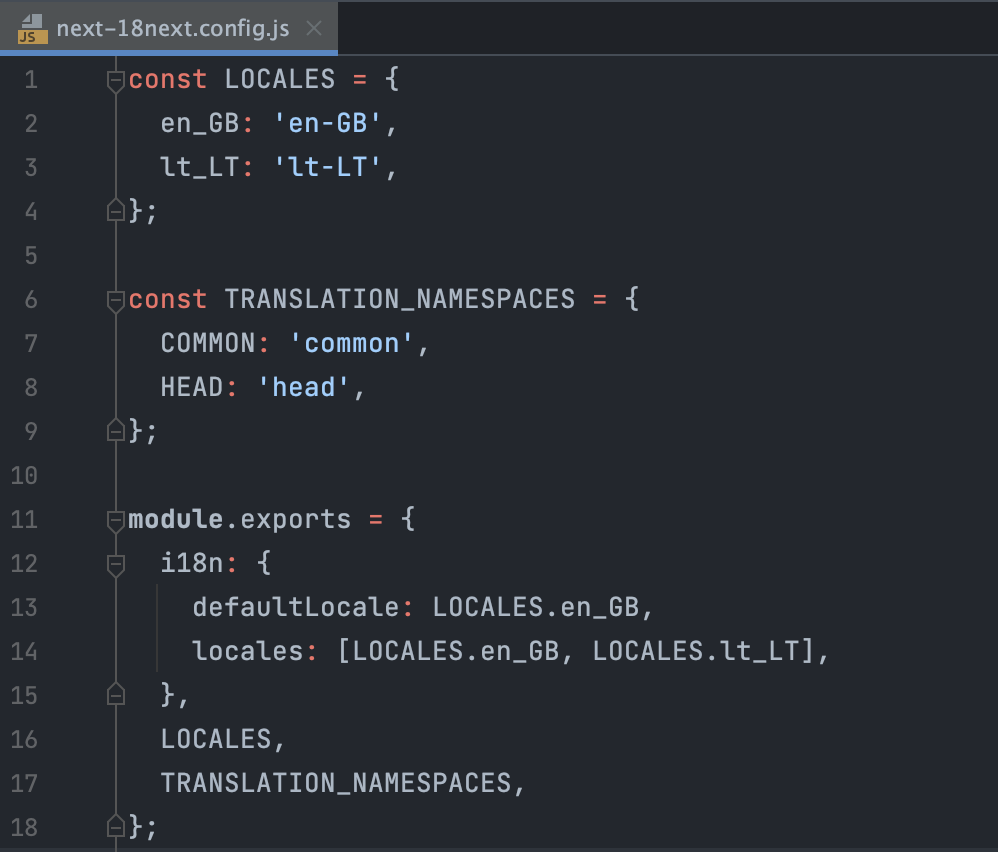
5.1 I18n setup
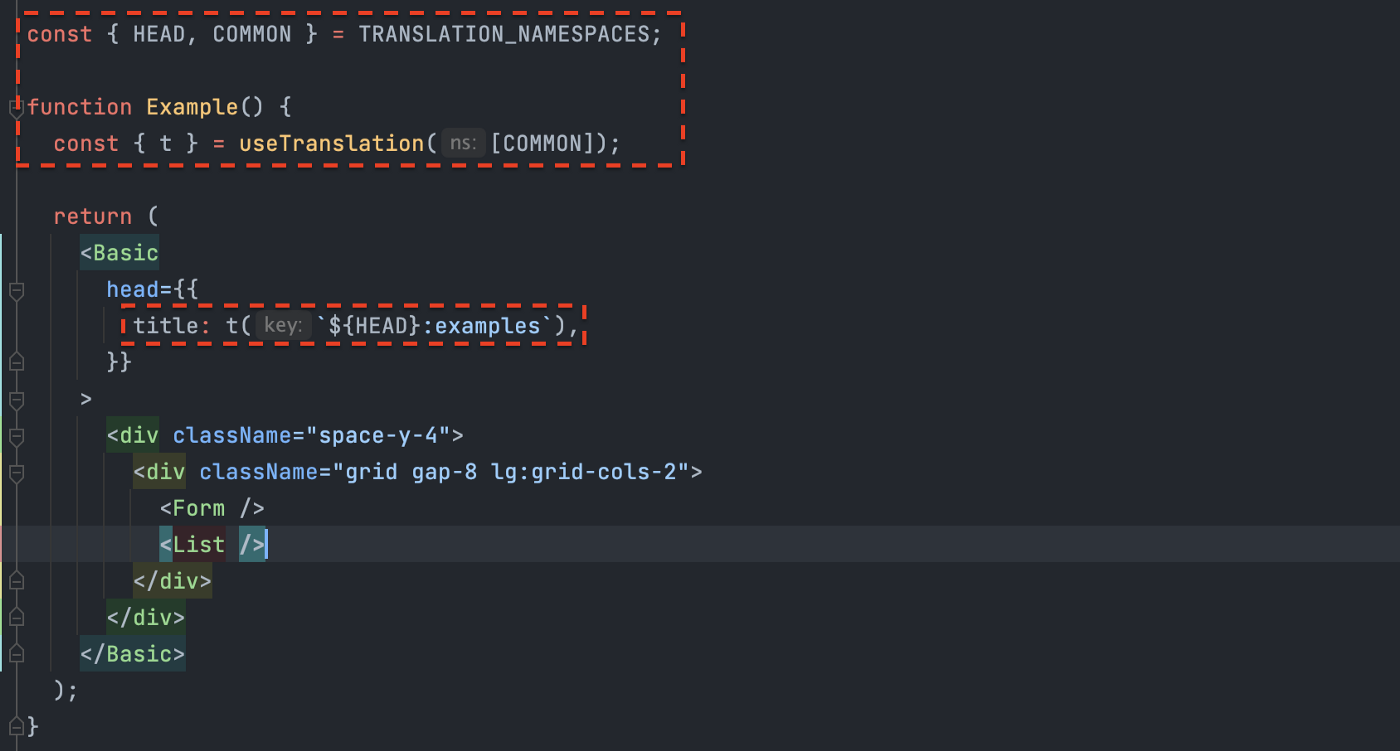
This project starter features an I18n setup for both SSR and CSR using next-i18next. This means that translations are loaded on the server and passed to the client, ensuring that the initial page render already includes the translated content.
5.2 Different namespaces
I find it useful to split translations into different namespaces. For example, you could have a 'common' namespace for shared translations and a 'dashboard' namespace for translations specific to the dashboard. This keeps your translation files small and focused.
6: Keeping the global state management simple
Before reaching for a state management library, evaluate the business case. Do you really need global state, or can you solve the problem with local component state, props, or React Query's cache?
6.1 Server state
The server state is fundamentally different from the client state. Server state is data that lives on the server and is fetched by the client. It's asynchronous, can become stale, and can be shared across components. React Query is the perfect tool for managing server state.
6.2 Client state
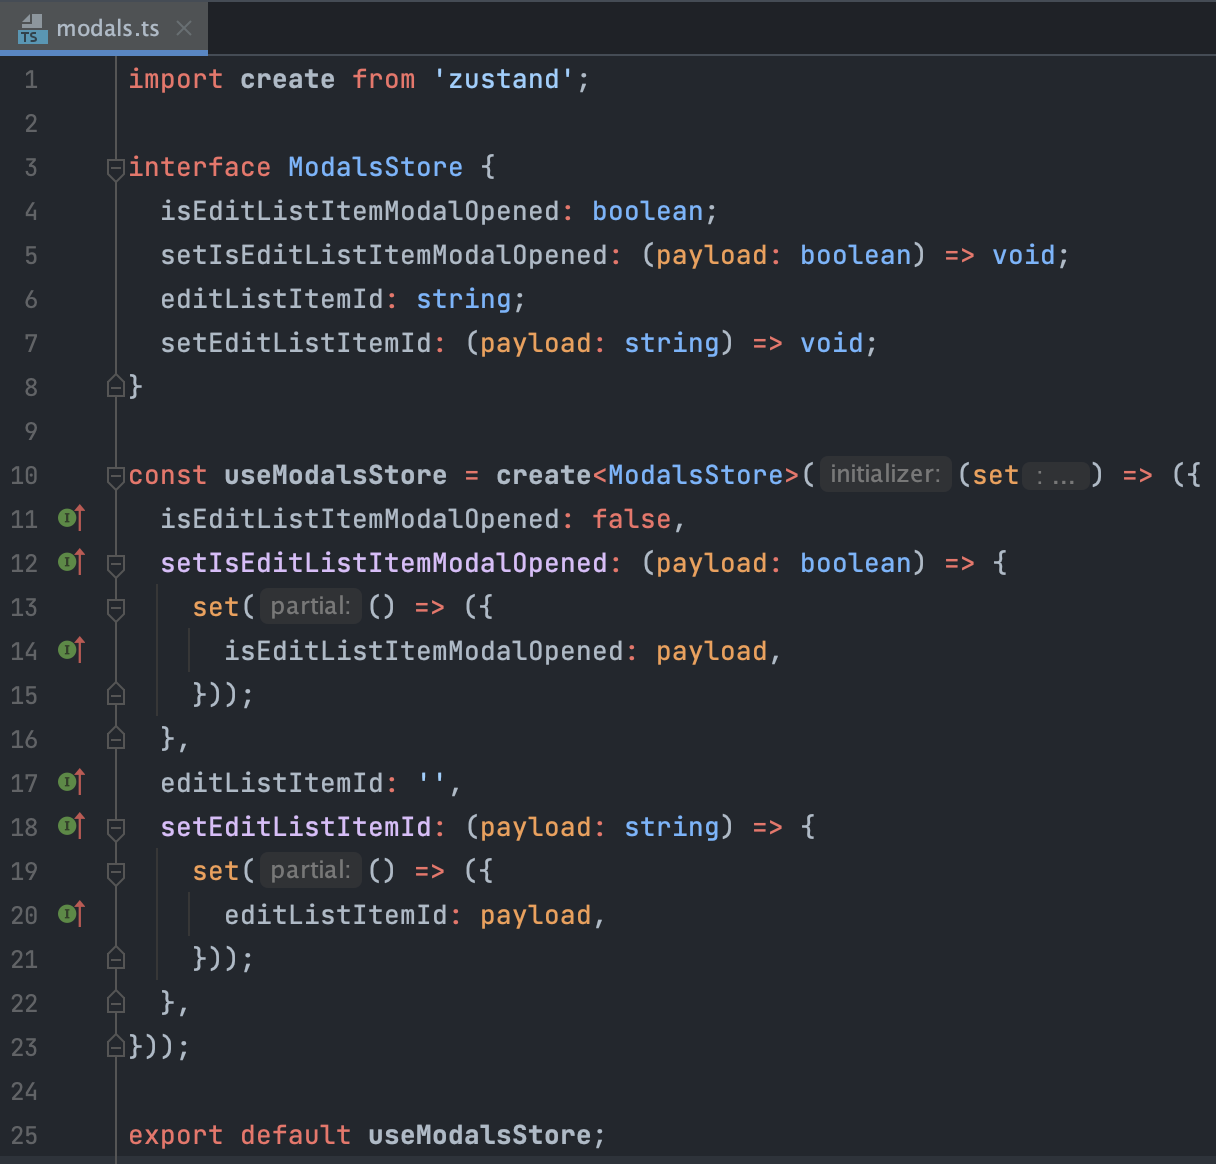
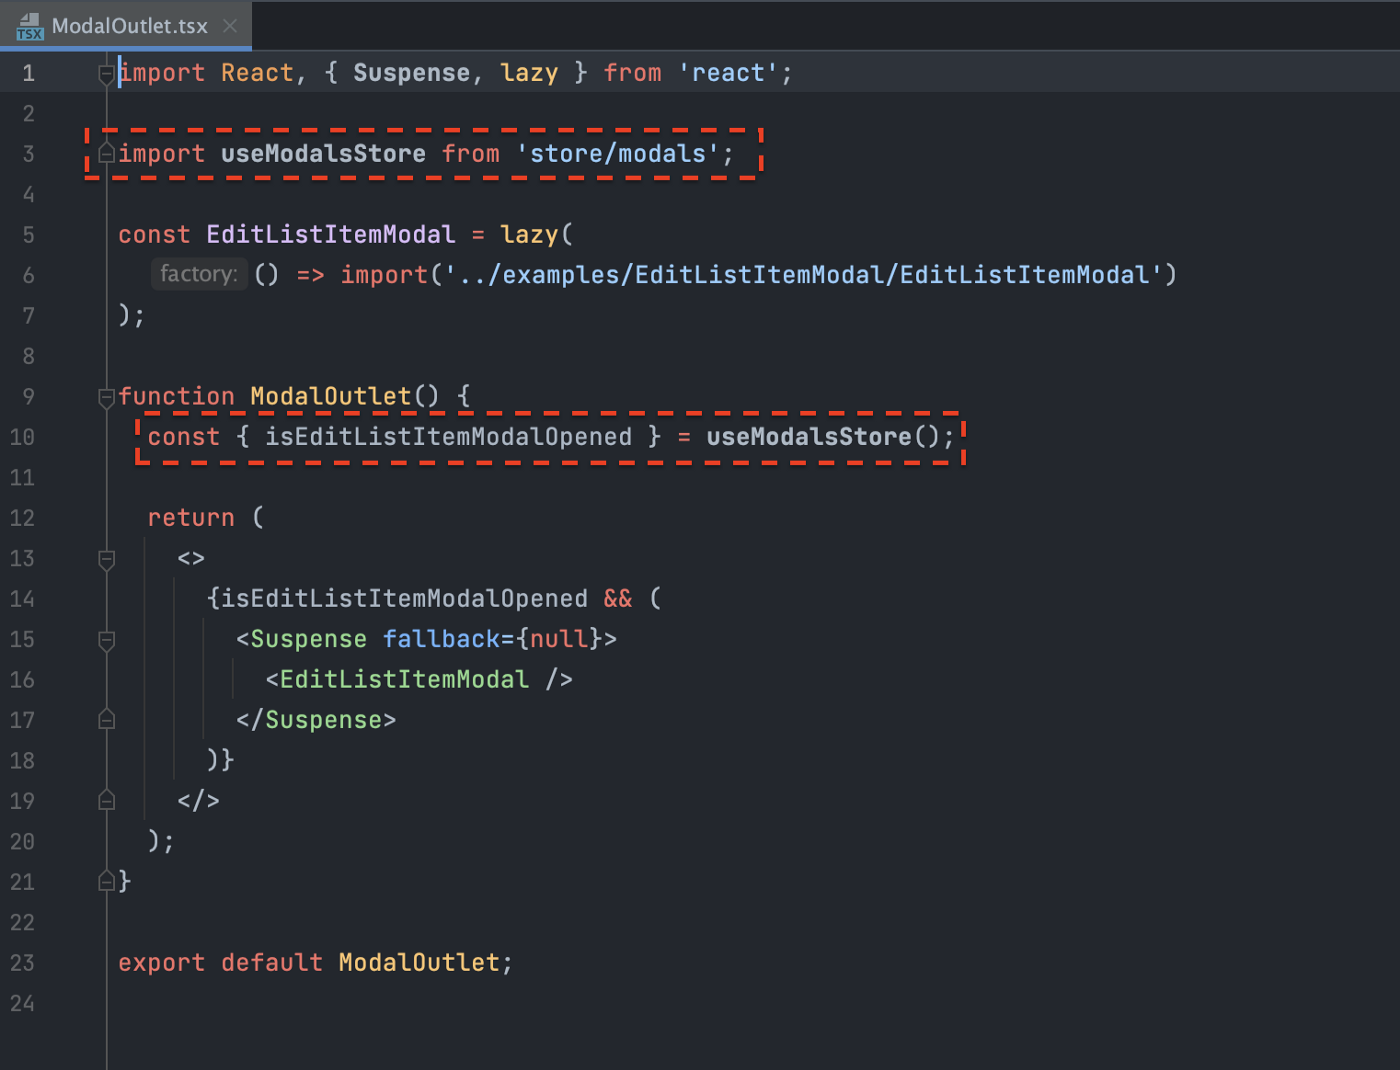
Client state is simply a state that handles your app's state until a user refreshes the page. It includes things like modal visibility, form input values, and UI preferences. For this, I recommend Zustand - a lightweight state management library that's simple and performant.

You can find this code at store/modals.ts
7: Keeping the code clean by linting
7.1 TypeScript
Next.js supports type checking at build time. TypeScript helps catch type-related bugs before they reach production and provides excellent IDE support with autocompletion and inline documentation.
7.2 Eslint
Eslint is responsible for JavaScript, TypeScript, React and Next.js code rules. It catches common mistakes, enforces coding conventions, and helps maintain consistency across the codebase.
7.3 Prettier
Prettier handles settings for how the code looks. It automatically formats your code to a consistent style, so you never have to argue about tabs vs spaces or semicolons again.

Prettier formatting in action
8: Organizing utilities, constants, models and hooks
8.1 Utilities

8.2 Constants
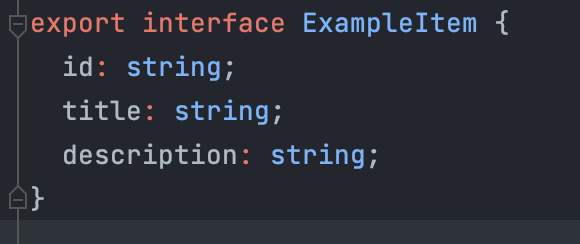
8.3 Models
8.4 Hooks
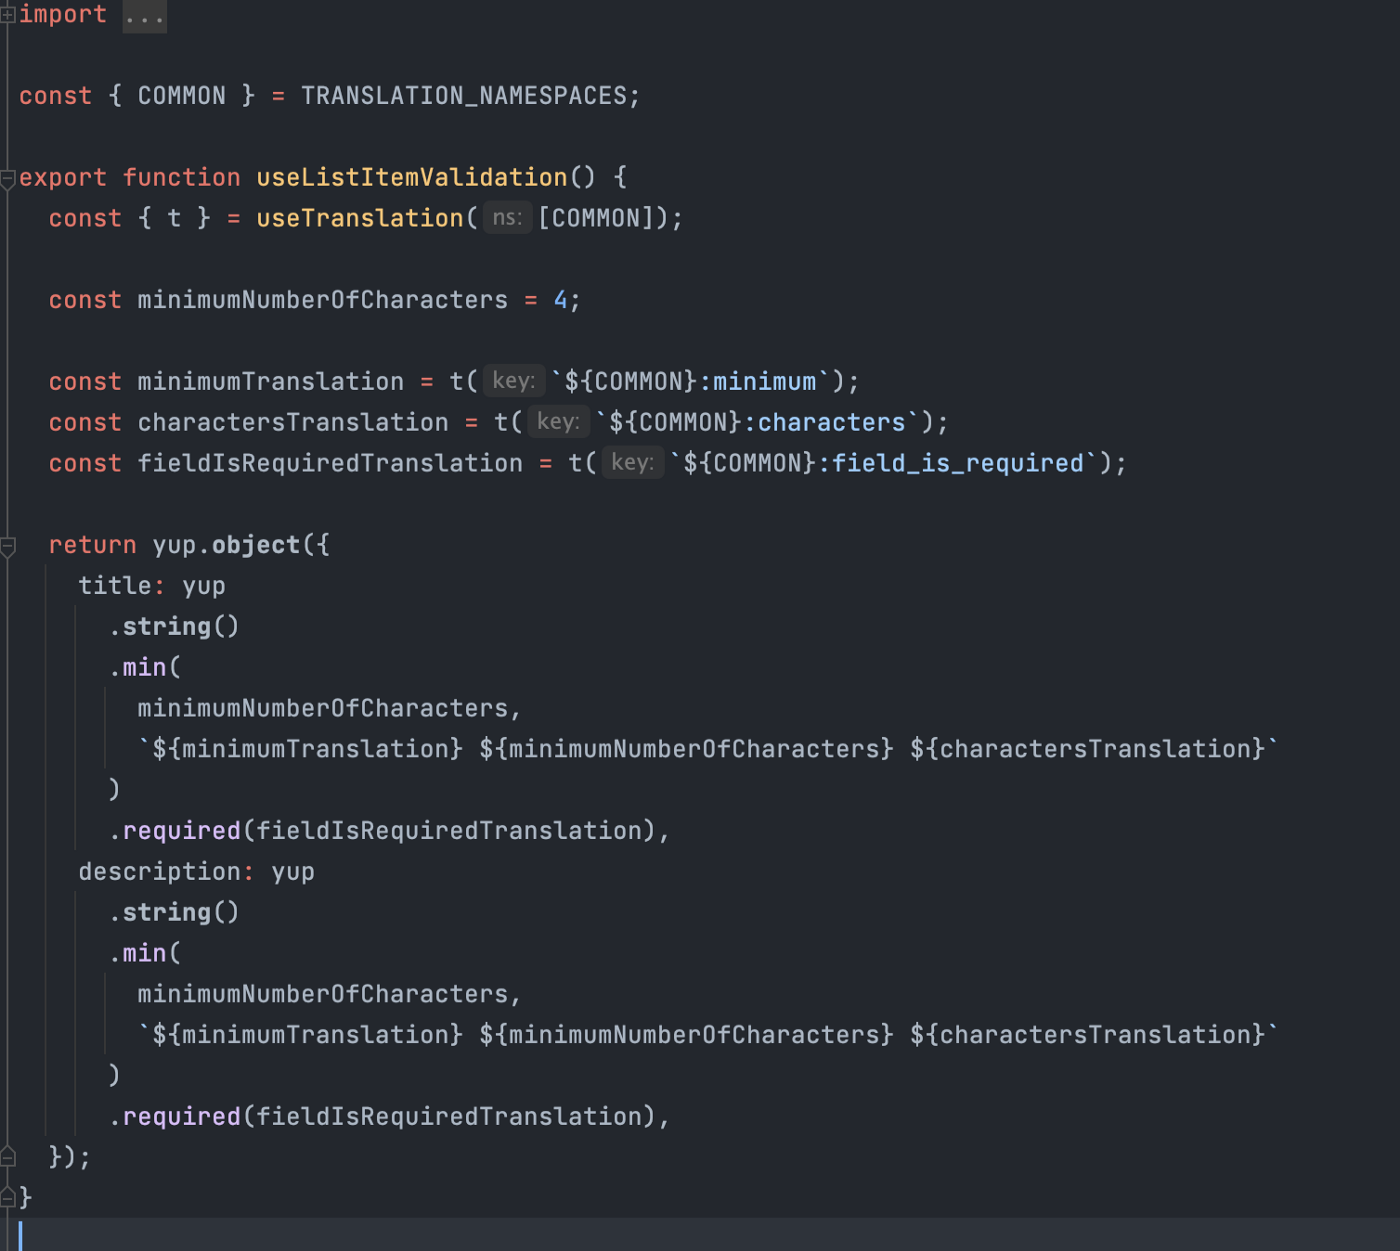
Custom hooks are a great way to encapsulate reusable logic. For example, you could create a hook that wraps Formik validation logic, making it easy to reuse across different forms in your app.
Conclusion
In this article, we've explored a blank Next.js project starter for large projects. We've covered how to connect to a REST API with SSR and CSR, manage caching and mutations with React Query, structure UI components, style with Tailwind, test with Jest and Cypress, add multi-language support, manage global state with Zustand, lint with TypeScript, Eslint and Prettier, and organize utilities, constants, models and hooks.
I hope you've been able to pick up some useful tips and insights along the way. Happy coding!
Project starter GitHub repository link: next-js-project-starter-for-large-projects